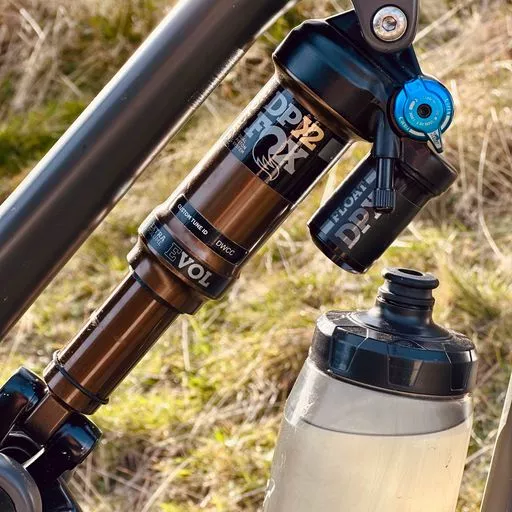
Mountain bike shock pressure
If you’re an avid mountain biker, you understand the importance of a well-tuned suspension system. One critical aspect of achieving a smooth and controlled ride is setting up the air pressure in your mountain bike shock. In this guide, we’ll walk you through the steps of adjusting your mountain bike shock pressure to ensure a comfortable and efficient ride. Whether you’re a beginner or an experienced rider, these tips will help you get the most out of your suspension system.
Understanding the Basics when it comes to mountain bike shock pressure
Before you dive into adjusting your mountain bike shock pressure, it’s essential to understand the key concepts involved:
- SAG: SAG is the amount your suspension compresses when you’re sitting on your bike in a neutral riding position. It’s a crucial factor in determining how your suspension performs.
- Positive and Negative Air Chambers: Many modern mountain bike shocks have both positive and negative air chambers. The positive chamber is the one you adjust, while the negative chamber helps maintain the balance and sensitivity of the mountain bike shock pressure.
Step-by-Step Guide to Setting Up Mountain Bike Shock Pressure
- Find the Recommended Pressure Range: Most shocks have a recommended air pressure range based on your weight. Check the manufacturer’s guidelines, which are often available on their website or included with your bike’s manual.
- Prepare Your Shock Pump: You’ll need a shock pump designed for mountain bike suspension and setting up the mountain bike shock pressure. These pumps have a pressure gauge and a fine-tuned pressure release valve. Make sure it’s properly connected to your shock’s air valve.
- Measure Your SAG: To set up your suspension correctly, you need to determine the SAG. Start by sitting on your bike in your normal riding position, with all your gear on. Your suspension should compress slightly. Measure the distance from the O-ring (a small, plastic ring on the shock shaft) to the shock body.
- Adjust the Pressure: If your SAG is within the recommended range (typically 25-30% of the shock’s travel for rear suspension), you’re good to go. If not, you’ll need to adjust the air pressure. Add air if your SAG is too much, or release air if it’s too little.
- Fine-Tune the Settings: After your initial adjustment, take your bike for a test ride on your favorite trails. Pay attention to how the suspension feels. If it’s too harsh or too soft, make small pressure adjustments and test it again. It may take a few iterations to find the perfect setup for your riding style.
- Record Your Settings: Once you’ve found the ideal shock pressure, make a note of it for future reference. If you change your riding conditions or gear, you may need to adjust the pressure again. Use SAGLY for recording your mountain bike settings. SAGLY is a mobile app to document, tune and compaire your MTB settings.
Additional Tips
- Regularly check your shock pressure to ensure it stays within the recommended range.
- Keep your shock pump in good condition and check it for accuracy periodically.
- If you’re unsure about the setup, consider consulting a professional bike shop or a certified suspension specialist for expert advice or use SAGLY.
Setting up the mountain bike shock pressure is a fundamental aspect of achieving a comfortable and efficient ride. By understanding the basics and following the steps outlined in this guide, you can fine-tune your suspension to match your riding style and preferences. Experiment with your settings, and remember that it’s a dynamic process that may require adjustments as you gain experience and tackle different types of terrain. Properly tuned suspension can make a world of difference in your mountain biking experience, so take the time to get it right. Also do not forget to try SAGLY. SAGLY helps you with your mountain bike shock pressure and with all your mountain bike setup and maintenance.
Download SAGLY, a complete mobile guide, which helps you set up your MTB settings and maintain your bike.

