
ROCKSHOX FORK SETUP GUIDE
Set up your RockShox Pike, Lyrik, ZEB, BoXXer, SID or SID SL with a reliable starting pressure, measured SAG, correctly counted rebound clicks and a repeatable trail-testing process.
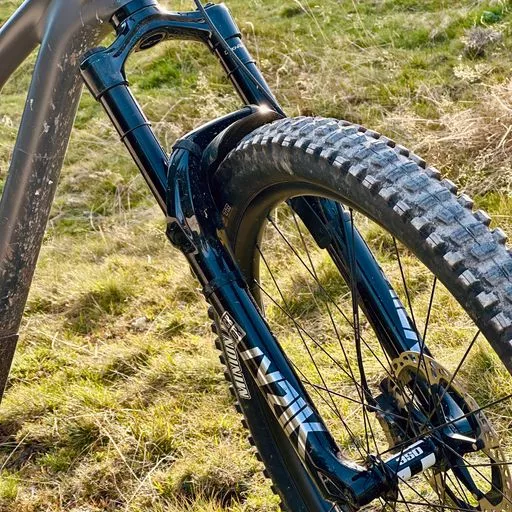
Air pressure is only the beginning.
Use pressure, SAG, rebound, compression and volume spacers as one connected system.Before you start
Use your exact fork serial number whenever possible. RockShox generations, travel configurations, air springs and dampers can use very different settings even when the model name is the same. The pressure tool below uses the official 2026 tables for current-generation forks; verify older forks in RockShox TrailHead or on the air chart printed on your fork.
In this guide
RockShox air-pressure calculator by rider weight
Enter your weight including normal riding kit, then choose the exact model family and travel. The result is a manufacturer starting range—not a finished setup. Measure SAG and test on the trail before deciding whether pressure should change.
Starting-pressure finder
Select a current-generation 2026 RockShox air fork.
Generation warning
Do not apply a current Pike, Lyrik, ZEB, BoXXer or SID pressure range blindly to an older fork. A previous-generation air spring may require a substantially different pressure. Always check the model ID, serial number, travel and maximum permitted pressure.
Embedded RockShox fork SAG calculator
SAG is the amount of travel used by the fork under your normal riding load. Measure it in your attack position with your riding kit on, compression damping open or centered as specified for the fork, and the fork fully equalized.
Fork SAG calculator
Measure how far the O-ring moved from the dust wiper.
Accurate SAG measurement
- Wear your normal helmet, shoes, pack and water.
- Set compression to the correct starting position for your damper.
- Equalize the positive and negative air chambers by cycling the fork slowly.
- Recheck pressure after equalization.
- Use a wall or helper so braking does not distort your position.
- Repeat the measurement two or three times.
The correct RockShox fork setup order
Identify the fork
Record the serial number, model, production generation, travel, wheel size, air spring and damper.
Set pressure
Use the lower-leg chart, TrailHead or the current-generation calculator above as the first pressure range.
Equalize chambers
Cycle the fork slowly through part of its travel, reconnect the pump and restore the intended pressure.
Measure SAG
Check the result in your normal riding position and adjust pressure in small steps only.
Set rebound
Use the TrailHead recommendation, counted from fully closed/slow, then tune one or two clicks at a time.
Test compression
Begin at the specified neutral/open setting, ride one repeatable section and change only one variable.
RockShox setup by model: Pike, Lyrik, ZEB, BoXXer and SID
RockShox Pike setup
Pike is the trail-focused option in this group. Prioritize front-wheel grip and an active beginning stroke without losing braking support.
Good Pike baseline
- Use the 120 mm pressure row separately from the 130–140 mm row.
- Do not chase minimum SAG if the front tire loses grip on roots and flat turns.
- If the fork dives but still feels harsh, add a small amount of low-speed compression before automatically adding a large amount of pressure.
- If it rides well early in the stroke but will not use deeper travel, review HSC and Bottomless Tokens.
RockShox Lyrik setup
Lyrik targets aggressive trail and all-mountain riding. The goal is traction and comfort with enough mid-stroke support for steeper terrain and harder compressions.
Good Lyrik baseline
- The 140 mm version uses a higher starting pressure row than 150–160 mm.
- Start Charger 3/3.1 high- and low-speed compression at the neutral 0 position when applicable.
- Use low-speed compression to support braking and body movement; do not use it to mask excessive SAG.
- On repeated rough impacts, a packed-down feeling often points to rebound that is too slow rather than insufficient pressure.
RockShox ZEB setup
ZEB is intended for enduro and very demanding single-crown use. It can run lower pressure than a rider might expect, so use the correct travel row rather than copying Pike or Lyrik numbers.
Good ZEB baseline
- Select the 150–160, 170–180 or 190 mm row carefully; pressure decreases as the listed travel group increases.
- If the fork feels harsh and rides high, first verify pressure, chamber equalization and open compression settings.
- If it dives on steep sections but remains comfortable through chatter, add low-speed compression one click at a time.
- If it bottoms hard only on the biggest hits, consider one token or one click of HSC after pressure and SAG are correct.
RockShox BoXXer setup
BoXXer is a downhill fork, and its current 180 mm pressure row differs dramatically from the 190–200 mm row. Confirm travel before inflating.
Good BoXXer baseline
- Equalize the air chambers by slowly compressing the fork through roughly the initial part of its travel, then restore pressure.
- BoXXer Ultimate: begin HSC and LSC at the neutral 0 position.
- BoXXer Select: use the damper-specific middle compression position before trail testing.
- Judge support at real downhill speed; a car-park push test cannot reproduce braking bumps, compressions and repeated impacts.
RockShox SID and SID SL setup
SID and SID SL are cross-country forks, but their current pressure tables are not interchangeable. Choose the correct model in the calculator.
Good SID baseline
- SID SL generally uses a much higher listed pressure range than current SID; verify the exact name and serial.
- Balance pedaling support against grip rather than setting the fork as firm as possible.
- Test lockout or threshold functions separately from the open-mode setup.
- If the fork skips across roots, check pressure and rebound speed before adding more compression.
RockShox rebound starting point and tuning tables
Rebound controls how quickly the fork returns after compression. RockShox counts its TrailHead recommendation from the fully closed, slow position—the direction marked by the turtle. Because total click counts and damping tunes vary by model, damper and year, there is no honest universal “eight clicks for every Pike” rule.
| Step | What to do | Why it matters |
|---|---|---|
| 1. Find exact recommendation | Enter the fork serial number in TrailHead. | It identifies the specific fork generation and damper. |
| 2. Close rebound gently | Turn clockwise toward the turtle until it stops. Do not force it. | This gives a repeatable zero point. |
| 3. Count clicks open | Turn counter-clockwise exactly the recommended number of clicks. | RockShox recommendations are counted from closed/slow. |
| 4. Repeat one rough section | Ride the same roots, braking bumps or compressions. | Rebound problems appear most clearly through repeated impacts. |
| 5. Adjust 1–2 clicks | Change only rebound, then repeat. | Small isolated changes are easier to understand. |
| What the fork does | Likely rebound state | Adjustment |
|---|---|---|
| Springs back, feels nervous or loses contact after impacts | Too fast | Add 1–2 clicks of rebound damping: clockwise, toward the turtle. |
| Packs down, feels dead or gets harsher through repeated hits | Too slow | Remove 1–2 clicks: counter-clockwise, toward the hare/jackalope. |
| Pressure increased by roughly 5–10 psi | Spring has more return energy | You may need 1–2 clicks more rebound damping. |
| Pressure decreased by roughly 5–10 psi | Spring has less return energy | You may need 1–2 clicks less rebound damping. |
RockShox compression setup explained
Compression damping resists fork movement while the fork is compressing. “High speed” and “low speed” describe the speed of damper-shaft movement—not simply the speed of the bicycle.
Low-speed compression (LSC)
LSC mainly influences slower suspension movements caused by braking, pumping, cornering load, transitions and rider weight shifts.
Add a little LSC when: the fork dives excessively under braking, collapses in berms or lacks a stable platform despite correct pressure and SAG.
Remove LSC when: the fork feels reluctant to move, lacks grip or transmits too much trail texture through the hands.
High-speed compression (HSC)
HSC mainly influences rapid shaft movements from rocks, roots, square edges, drops, hard landings and sharp compressions.
Add a little HSC when: the fork blows through travel during hard fast impacts but SAG and general support are correct.
Remove HSC when: the fork feels harsh on sharp hits or does not use enough travel at speed.
| Fork / damper family | Recommended initial compression position |
|---|---|
| MY23+ Ultimate / Select+ with separate HSC and LSC | Begin both adjusters at the neutral middle position marked 0. |
| MY23+ Select / Base with a single compression adjuster | Begin at the middle position. |
| Other / older suspension | Begin fully open unless the manual or TrailHead specifies another position. |
| BoXXer Select current generation | Set the single compression control to its damper-specific middle position. |
Bottomless Tokens and volume-spacer guidance
Bottomless Tokens reduce positive air-chamber volume. They make the air spring more progressive, meaning force rises more strongly deeper in the travel. Tokens mainly change end-stroke behaviour; they are not a substitute for correct pressure, SAG or compression settings.
Token decision guide
- Add one token: correct SAG, good sensitivity, but frequent hard bottom-outs on relevant terrain.
- Remove one token: correct SAG, acceptable early stroke, but deep travel remains inaccessible on hard terrain.
- Do not add a token first: the fork already feels harsh through the whole stroke or pressure is too high.
- Do not remove tokens first: the fork dives excessively because SAG is too high or LSC is fully open.
Check the permitted installed and maximum token count for your exact model ID and travel before changing the air spring.
RockShox fork troubleshooting by symptom
Harsh hands and arm pump
Check first: tire pressure, fork pressure, open compression, lower-leg service condition and rebound packing.
Trail test: open LSC or HSC one click at a time. If the fork gets harsher through repeated hits, speed rebound up 1–2 clicks.
Diving under braking
Check first: excessive SAG, low pressure, riding position and LSC.
Trail test: if SAG is correct, add one click of LSC. Avoid adding a large pressure increase that destroys grip everywhere else.
Not using full travel
Check first: pressure, SAG, HSC, token count, terrain severity and mechanical friction.
Trail test: change one variable and repeat the same hard section. Read the complete MTB fork not using full travel guide.
Bottoming out
Check first: SAG, pressure loss, open HSC, token count and whether the impact is unusually severe.
Trail test: add small support changes in this order: verify pressure, add HSC if available, then consider one token.
Front wheel lacks grip
Check first: excessive pressure, too much compression, rebound too fast, tire pressure and cockpit weight distribution.
Trail test: open compression one click or reduce pressure slightly while rechecking SAG. Keep only the change that improves repeatable corner or root performance.
Fork packs down in rough sections
Check first: rebound that is too slow.
Trail test: open rebound 1–2 clicks and repeat the same braking bumps or roots. The fork should recover without becoming nervous.
Real-world setup: test one change at a time
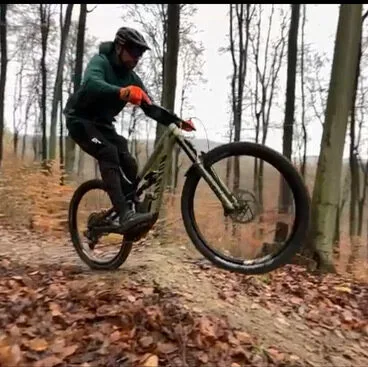
The bracketing method
- Save your current pressure, SAG and click settings.
- Choose one short repeatable section.
- Make one noticeable but safe change.
- Ride the section at similar speed and line choice.
- Mark the result as better, worse or no clear difference.
- Return halfway toward the better setting and repeat.
This prevents random tuning and gives each click or PSI change a clear purpose.
Interactive RockShox setup checklist
Complete before your first full-speed run
0 of 10 steps complete
RockShox setup FAQ
Quick answers before your next ride
Start with a safe baseline, change one setting at a time and confirm every adjustment on a repeatable trail section.
How much SAG should I run on a RockShox fork?
A common starting zone for an MTB fork is roughly 15–20%, but the correct result depends on fork model, travel, bike geometry, terrain and the balance of grip versus support. Measure performance on the trail rather than treating one percentage as mandatory.
Are RockShox air-pressure settings based on body weight?
Use total riding weight, including helmet, shoes, pack, water and normal equipment. Then verify the result with SAG and trail testing.
From which direction do I count RockShox rebound clicks?
RockShox TrailHead recommendations are counted from the fully closed, slow position marked by the turtle. Turn the adjuster gently clockwise until closed, then count clicks counter-clockwise.
Should compression be fully open during setup?
It depends on the damper. Current MY23+ Ultimate and Select+ dampers generally begin with HSC and LSC at the neutral 0 position. Current Select or Base models begin at the middle position, while many older forks begin fully open. Verify the exact fork.
Do more Bottomless Tokens make a fork firmer?
More tokens mainly increase progression deeper in the stroke. They make bottom-out resistance rise more strongly near full travel, but they do not replace correct air pressure or damping.
Why does my RockShox fork feel harsh even with correct SAG?
Possible causes include too much compression damping, rebound packing, excessive progression, high tire pressure, dry seals, overdue lower-leg service or bushing friction. Change one variable at a time and stop tuning if the fork shows leakage, abnormal play or failure to extend.
Technical sources
Pressure ranges and current travel groups: SRAM / RockShox 2026 Front Suspension Specifications. Initial setup and click-count direction: RockShox Suspension Welcome Guide. Rebound and compression fine tuning: RockShox Suspension Fine Tuning. Always verify exact settings using TrailHead.
Suspension setup is safety-relevant. Follow the permitted settings, maximum pressures, token counts and service instructions for your exact component. Stop riding and consult a qualified technician if the fork leaks, has abnormal play, does not extend correctly, makes unusual noises or shows visible damage. SAGLY is independent and is not affiliated with SRAM or RockShox.