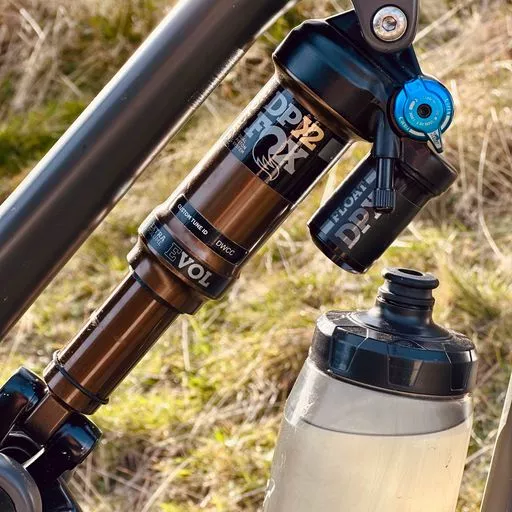
MTB Rear Shock Pressure Calculator
Calculate a starting pressure or refine your current pressure using measured SAG.
Correct rear-shock pressure gives your mountain bike grip, support and control. Use the calculator below to estimate a starting pressure or refine your current setup using your measured SAG.
Rear-shock pressure cannot be calculated perfectly from rider weight alone. Frame leverage ratio, shock size, air-can design and target SAG all influence the correct pressure.
The most reliable method is to enter your current pressure, measured SAG and desired SAG, then verify the result on the bike.
Calculate your MTB rear-shock pressure
Choose an approximate starting-pressure calculation or refine your current pressure using a real SAG measurement.
What to do next
How much pressure should an MTB rear shock have?
There is no universal rear-shock pressure that works for every rider of the same weight. Two riders weighing 85 kg may need very different pressures because their bikes can have different leverage ratios, shock strokes, air-can volumes and suspension kinematics.
Rider weight in pounds is sometimes used as a quick initial pressure estimate. For example, a rider weighing 180 lb may begin testing near 180 psi. However, this is only a rough starting point and should never replace a SAG measurement.
Begin with the bike manufacturer’s recommendation, measure SAG and then adjust pressure in small steps. The calculator’s refine mode uses your real SAG measurement and is therefore more useful than rider weight alone.
What is rear-shock SAG?
SAG is the amount the rear shock compresses under the rider’s normal riding weight while the bike is stationary.
SAG allows the rear wheel to move both upward over impacts and downward into holes and depressions. Too little SAG can reduce grip and comfort. Too much SAG can reduce support and make the bike ride too deeply in its travel.
| Riding style | Typical starting range | General feeling |
|---|---|---|
| Cross-country | Approximately 20–25% | Efficient and supportive |
| Trail | Approximately 25–30% | Balanced support and grip |
| Enduro | Approximately 28–30% | More grip and active travel |
| Downhill / bikepark | Approximately 28–32% | Grip and control on rough terrain |
These are broad starting ranges. Use the recommendation supplied by your bike manufacturer whenever one is available.
How to measure rear-shock SAG correctly
Use this repeatable process
- Wear your normal equipment. Include helmet, shoes, backpack, tools and water.
- Open compression damping. Put the shock in its normal open riding mode unless the manufacturer specifies another procedure.
- Equalize the air chambers. After changing pressure, compress the shock several times.
- Move the O-ring to the shock body. Do this before carefully getting onto the bike.
- Adopt a neutral riding position. Use support from another person or a wall without placing excessive weight through your hand.
- Step off carefully. Avoid compressing the shock again while dismounting.
- Measure the used shock stroke. Divide the compressed distance by the total shock stroke and multiply by 100.
You can also read our detailed guide on how to set MTB SAG correctly .
How this rear-shock pressure calculator works
Pressure correction using measured SAG
When you enter your current pressure, measured SAG and target SAG, the calculator applies a proportional pressure correction.
Corrected PSI = current PSI × measured SAG ÷ target SAGWhen measured SAG is higher than the target, the calculator adds pressure. When measured SAG is lower, it reduces pressure.
Air springs are not perfectly linear, so you must measure SAG again after applying the result.
Approximate starting-pressure estimate
When no SAG measurement is available, the calculator uses total riding weight in pounds as a broad 30% SAG baseline and adjusts the value according to the selected target SAG.
Estimated PSI = total riding weight in lb × 30 ÷ target SAGThis estimate cannot account for the bike’s leverage ratio or shock design. It should only be used to reach a safe first SAG measurement.
Why two bikes need different shock pressures
Rear-shock pressure is influenced by more than rider weight. Important variables include:
- Frame leverage ratio and progression
- Shock stroke and eye-to-eye length
- Positive and negative air-chamber design
- Air-can size and installed volume spacers
- Bike weight
- Rider weight including equipment
- Target SAG
- Riding terrain and speed
- Desired grip, comfort and support
This is why copying another rider’s pressure is not necessarily useful, even when the rider weighs the same.
Should I add or remove rear-shock pressure?
| What you notice | Possible direction | What to test |
|---|---|---|
| More SAG than intended | Pressure may be too low | Add approximately 5 psi and measure again |
| Less SAG than intended | Pressure may be too high | Remove approximately 5 psi and measure again |
| Bike dives or rides very low | Not enough pressure or support | Verify SAG before changing compression |
| Rear wheel lacks grip over small bumps | Pressure may be too high | Check SAG, pressure and rebound |
| Frequent harsh bottom-outs | Pressure or progression may be insufficient | Check pressure, spacers and compression |
| Travel is difficult to access | Pressure or progression may be excessive | Check SAG before removing volume spacers |
Confirm pressure and SAG first. Then adjust rebound and compression. Changing several variables simultaneously makes it difficult to understand what improved the bike.
Why does the pump show less pressure when reconnected?
When you reconnect a shock pump, some air from the shock fills the pump hose and gauge. This can make the newly displayed pressure lower than the pressure that was shown before the pump was removed.
This does not necessarily mean that the shock leaked while the pump was disconnected. The effect is more noticeable with small-volume air chambers.
Rear-shock pressure FAQ
Should rear-shock pressure equal rider weight in pounds?
Rider weight in pounds is only a rough starting point. Bike leverage ratio, shock dimensions, air-can volume and target SAG can require a substantially different pressure.
How much SAG should an MTB rear shock have?
Many trail and enduro bikes begin around 25–30% SAG, while some bikes and riding styles use different values. Follow the recommendation for your exact frame whenever available.
Should I measure SAG with riding equipment?
Yes. Wear the helmet, shoes, backpack, water and other equipment you normally carry because this weight influences shock compression.
Should I change pressure and rebound together?
No. First confirm pressure and SAG. Then adjust rebound separately so that you can understand the effect of each change.
What if the calculated result exceeds my shock’s limit?
Never exceed the manufacturer’s maximum permitted pressure. Check all entered values and consult the official frame and shock setup information or a qualified suspension technician.
Does the calculator work for coil shocks?
No. Coil shocks use a spring rate measured in pounds per inch rather than adjustable air pressure. Coil setup requires a spring-rate calculation.
This calculator provides an approximate setup baseline and cannot account for every frame leverage curve, shock tune, air-can configuration or component limitation. Follow the official specifications for your bike and shock. Never exceed the permitted pressure, and consult a qualified technician if the shock shows damage, leakage or abnormal behaviour.

Download SAGLY, a complete mobile guide for your mountain bike riding, suspension settings and maintenance.